

I recently moved a website from an Azure app service that was costing way too much for a small WordPress site to a virtual machine that gave me more control and cost less money every month. A virtual machine for a small site costs less but takes much more setup time and maintenance from my end. Moving a WordPress site to a VM isn’t difficult, but I ran across an issue moving the SSL certificate from the app service to my VM. The key vault was located in a different zone than the new VM, so it would not install using Microsoft’s step-by-step instructions. If you notice, these instructions show you how to go through each step using PowerShell, but you can create an SSL certificate and install it on IIS on your VM through your Azure portal dashboard.
Before You Start
Before you start this process, here are a few things to note:
- Microsoft will charge your account $69.99 for the certificate. It’s a yearly charge.
- The virtual machine that you create must be in the same zone as the key vault that you create. If you haven’t already created a key vault, take note of which zone your VM is stored. You can find this info by going to the virtual machines category in the Azure portal. The “Location” of your VM. When you create a key vault, make sure you put it in the same location.
- If you’ve already gone through Microsoft’s PowerShell instructions and have an error that says “Provisioning state Provisioning failed” when you attempt to perform a backup, you must disassociate the VM with the key vault. To remove a key vault associated with a VM, follow these instructions.
- You’ll need access to the domain registrar to create a TXT record on the DNS server. This will verify that you own the domain.
- RDP access to the VM
Create an Azure SSL Certificate in the Key Vault
If you haven’t already created an SSL certificate and key vault, you first need to create them. To create an SSL and key vault, follow these Microsoft instructions up until the point where you verify domain ownership. Skip the “Bind certificate to app” section. If you already have an SSL certificate and key vault, skip to the next section.
If Azure is unable to access the TXT record added in your registrar’s DNS settings, make sure that you’re using the right name servers. Some registrars use a default “parked” name server service after a domain is created. You need to change to the registrar’s name servers for your domain that will point to your Azure VM before you will be able to verify ownership. It should only take a few minutes after you create the TXT entry for Azure to verify ownership using this method.
Install the SSL Certificate on Azure IIS (on the VM)
If you search for how to install an SSL certificate on an IIS VM on Azure, Microsoft only gives instructions using PowerShell, but you can download the certificate and install it on your VM in the same way that you install an SSL certificate on a dedicated server through the Azure portal.
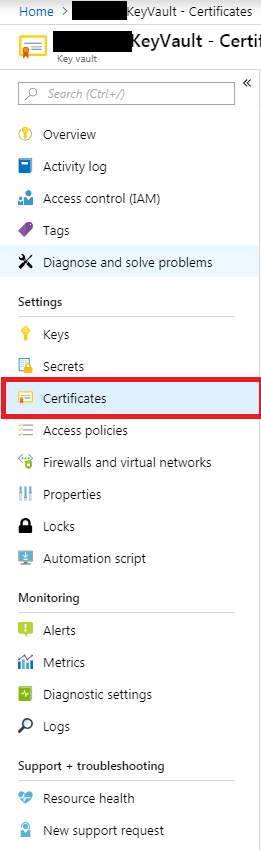
First open your Azure portal at portal.azure.com. From the list of resource groups, click the key vault that you created during the SSL and key vault creation process above. Click the “Certificates” menu item.
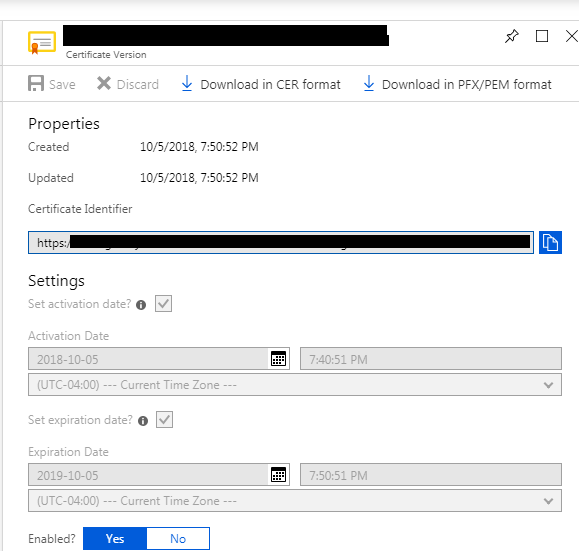
In the list of certificates, click the SSL certificate that you just created. Click the certificate listed as enabled.

A window opens where you can download your certificate in pfx/pem format. Click “Download in PFX/PEM format” to download a pfx file to your local computer.
This file can be transferred to your VM using RDP. After you copy the file to your VM, right-click the file and select “Import.” Follow the instructions to import the certificate. There will be no password when it asks you to enter one. Select the check box that asks if you want to make it exportable. This will let you export the certificate should you ever move to another VM or move the site to a different host.
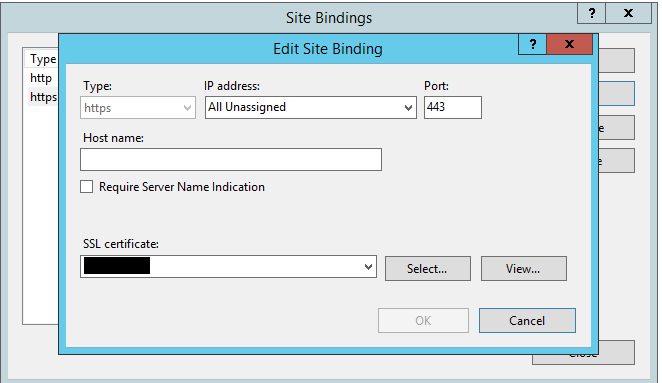
After you import the SSL certificate, you need to configure IIS to allow access to the site using port 443 HTTPS. Open the IIS administration console on your VM. Right-click your website name listed in the sites section and select “Bindings.” Click “Add” and your SSL certificate should now show up in the dropdown when you select “HTTPS” for the type.
Test your site from a web browser. Make sure you use HTTPS instead of HTTP. When you set up a certificate, you should 301 redirect from non-HTTPS connections to HTTPS. Follow these instructions to redirect your users (including people who click your site in search results) to HTTPS.
If you want to learn more about Azure and VM administration, click here.
This book will help you learn more about PowerShell scripting.
Thanks for publishing this. Exactly what I was looking for to be able to do this without powershell. However, I can’t figure out the transferring of the PFX to the VM via RDP. How do you do that exactly? Drag and drop?
Hey SB, yep. I just drag and drop the file to my VM using RDP. I believe this is a setting in your RDP instance that you have to enable. Something like “Share clipboard information” in settings before you connect to the VM.
Hi, you state that the VM must be in the same ‘zone’ as the vault. Is this really true? After all, you can make it exportable to a different host.
I’m hoping that I can use the same certificate for subdomains bound that are IP-bound to VMs across different tenants / subscriptions / regions.
Brian, that’s a really good point. It’s been a while since I did this, but I ran across a problem with creating the Vault. I initially made it in the wrong zone and couldn’t connect it with my VM. But as you say, the certificate is exported so maybe it doesn’t matter? It would make sense that it doesn’t, but I wonder if you would come across other issues with the vault being in a different zone than the VM.