

When you create a Windows virtual machine in Azure, a network interface card is automatically set up with a private and public IP address assigned to it. You might want to host another website with its own IP to make SSL binding easier. To configure a new IP, you must first create it in your Azure console and then configure the operating system on the VM. Most of Microsoft’s documentation tell you how to do this using PowerShell, but these instructions show you how to add an additional IP address to a Windows VM using the Azure GUI control panel.
Create a New IP
An adapter is added to any newly created VM, so first go to your Azure portal and click the VM name in your list of configured resources. In the screenshot below, the name is blacked out, but it displays a view of the “Networking” panel for the selected VM. You can see this dashboard by clicking “Networking” in the left panel after clicking your VM in the main resource dashboard.
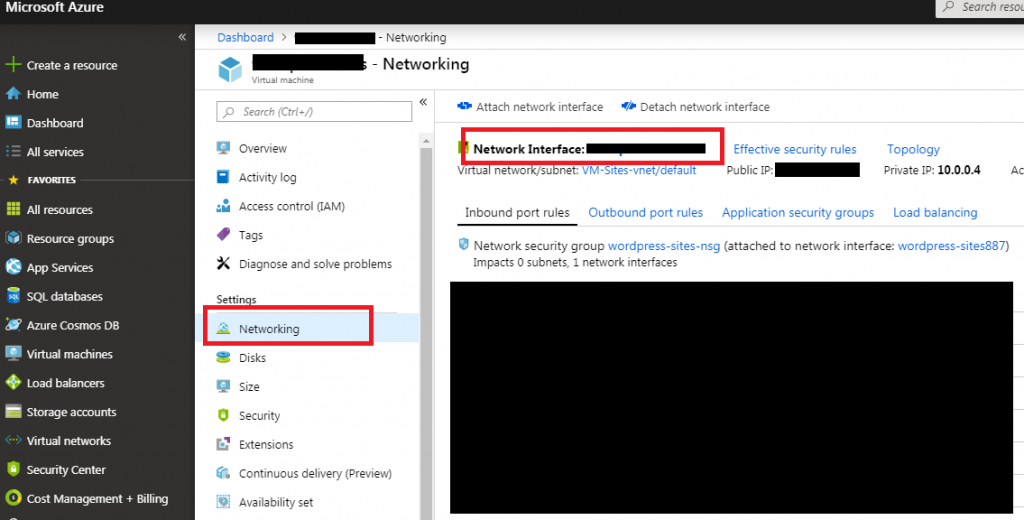
The “Networking” dashboard has the network interface name listed, which is also blacked out in the screenshot, but the name should be something like “<vm-name000>” where the zeros are random numbers generated by Azure.
Click the network interface name, and a list of IPs display. You should only see one IP listed, which was assigned when you created the VM. Azure assigns a private and a public IP address to the NIC.
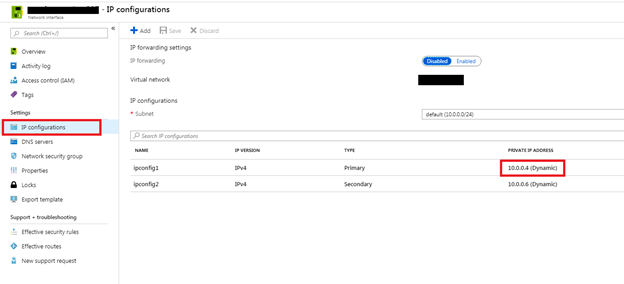
Click “IP Configurations” in the left panel, and you can see any IP address assigned to the NIC. The screenshot does not show the public IPs, but they display to the right of the public ones.
Click the “Add” button at the top of this dashboard, and a window opens where you configure your new IP.
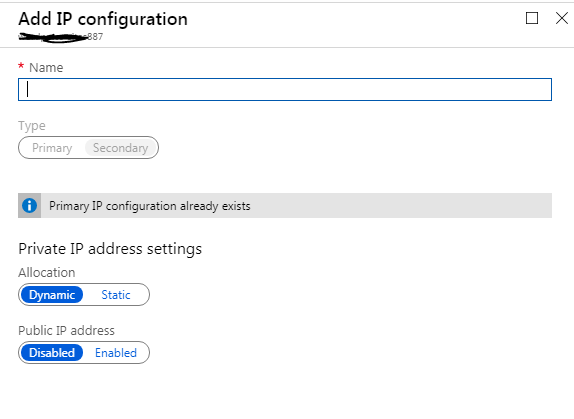
Type a name for the IP configuration. Since this is a second IP, click “Secondary” if it isn’t already selected. Leaving the “Allocation” option to dynamic will allow Azure to choose the next IP available on your subnet, so leave this option as “Dynamic.” Click “Enabled” for the “Public IP Address” setting, which will allow Azure to choose a public IPv4 address available and assigning it to the network interface.
Click “OK” to save the changes. It only takes a few seconds for Azure to provision the new IP. You’ll have to refresh the NIC IP settings page to see the new IP. You’ll see a private and a public IP displayed. You’ll need to take note of the private IP address to configure it with the server’s operating system in the next step.
Configure Windows to Use the New IP
The IP is configured but your server’s operating system needs to be configured to use it. If you enter ipconfig /all in the command line, you’ll see the first IP address with “(Preferred)” next to it.
In the “Run” text box, type “ncpa.cpl” and press enter, or open “Network Connections” in the Control Panel.
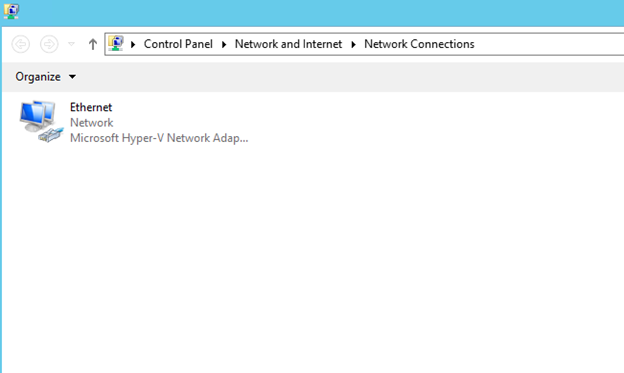
Double-click the Ethernet card, and then click “Properties.” You’ll see several adapter drivers configured for the NIC.
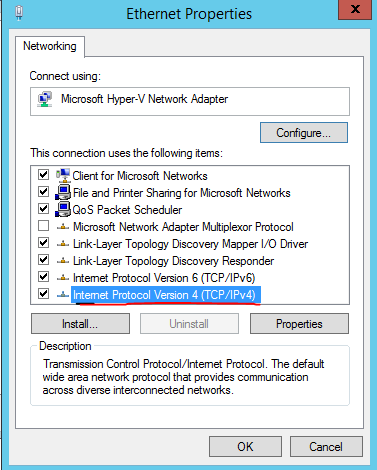
Select “Internet Protocol Version 4 (TCP/IPv4) and then click “Properties.”
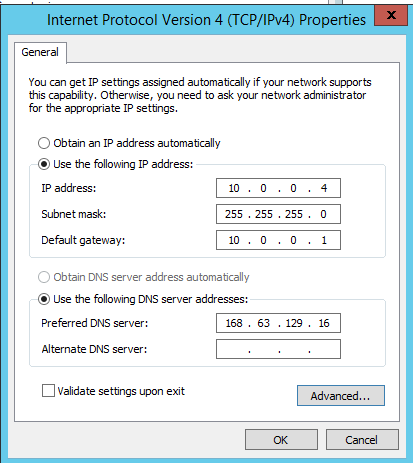
By default, the TCP/IP properties are set for DHCP to automatically obtain an IP address. Click “Use the following IP address” and configure the settings for the following:
IP Address: enter the primary IP address. The primary IP address is the first one assigned when you created the VM. It’s the one listed as “Preferred” when you use ipconfig /all in the command line.
Subnet mask: Unless you change the default settings during VM setup, you should be on the 10.0.0.0/24 subnet. You can find your subnet by going back to the Azure portal dashboard and view the IP settings for your network interface card. This is the window that displays the IPs configured for the NIC that you refreshed in the previous section.
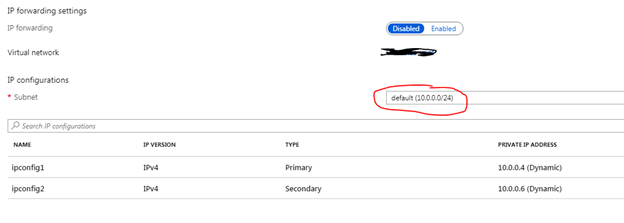
If the subnet mask listed is 10.0.0.0/24, the subnet mask is 255.255.255.0.
Default gateway: The default gateway is the first IP in your subnet. For the 10.0.0.0 subnet, the default gateway is 10.0.0.1. You can also get the default gateway by using the ipconfig /all information in the command line.
Preferred DNS server: If you do not have your own DNS server, enter 168.63.129.16. If you use your own DNS provider, enter the IP here.
Click the “Advanced” button and a window opens where you configure your second IP address.
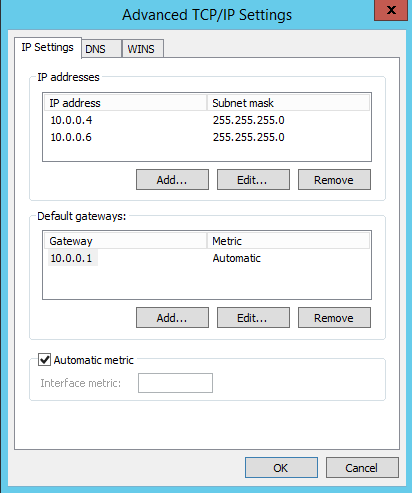
Click “Add” and enter the second IP address. The subnet mask would be the same as the primary IP address in this scenario.
Click “OK” and when you save your settings, an RDP window will disconnect for a second and then reconnect.
With the IP address configured, you will now see the new private IP address in your IIS settings, so you can now bind an additional website and SSL certificate to the new private IP.